Serve a React.js app from Nginx on a EC2 instance running ubuntu (From domain registration on Route53 to go live)
mong numerous options, one of the popular option to host React.js app is AWS EC2. In this article we’ll see how to deploy a react app with ngnix on a Ubuntu 20.04 LTS hosted as an AWS EC2 Instance.
Serve a React.js app from Nginx on a EC2 instance running ubuntu (From domain registration on Route53 to go live)

Among numerous options, one of the popular option to host React.js app is AWS EC2. In this article we’ll see how to deploy a react app with ngnix on a Ubuntu 20.04 LTS hosted as an AWS EC2 Instance.
This article assumes a basic knowledge on AWS and react and an active AWS account with console access.
Refresher: https://docs.aws.amazon.com/AWSEC2/latest/UserGuide/EC2_GetStarted.html
The article is divided into sections to make it easy to follow.
Domain registration
We used AWS Route53 to register the domain for simplicity, though it can be registered for free from Freenom or any other commercial vendor.
The process is pretty intuitive.
- Sign in to the AWSManagement Console and open the Route53 console
- choose Get started.
- Check for a available domain name
- Add to cart, fill up required details and proceed to purchase
- For some geolocations and TLDs, you might require to verify your email.
- We should be able to see your domain with activated status in Route 53 dash board (On some occasions, it may take some time)
For details we can consult official AWS instruction
Install and Configure ngnix on EC2 instance
- Launch an EC2 instance with Ubuntu LTS AMI (preferably 20.04)
- Connect to the console from preferred terminal through ssh: Open EC2 Dashboard > Select the instance id > Click on connect (Top right) > Get the details from ssh client tab and connect to the instance.
- Install nginx
sudo apt updatesudo apt install nginxIn the next step we’ll be configuring the firewall
- List the application configurations that ufw knows how to work with
sudo ufw app listthe output should be
Available applications: Nginx Full Nginx HTTP Nginx HTTPS OpenSSH- Enable the fire wall. If both HTTPS and HTTP is required then Full otherwise Only HTTP or HTTPS, based on requirement. In this example we are enabling both.
sudo ufw allow 'Nginx Full'Check the firewall status with
sudo ufw statusThe output should be like
Status: activeTo Action From-- ------ ----Nginx Full ALLOW AnywhereOpenSSH ALLOW AnywhereNginx Full (v6) ALLOW Anywhere (v6)OpenSSH (v6) ALLOW Anywhere (v6)If the status is inactive please run sudo ufw enable .
If OpenSSH is not allowed please allow it with sudo ufw allow ‘OpenSSH’ to keep using ssh
- Check the nginx status with
systemctl status nginxWe can start|stop|restart nginx with sudo systemctl start|stop|restart nginx
Next we need to create a server block for our website
Ubuntu 20.04 comes with a default server block at /var/www/html but for hosting multiple site and a default route, lets create a server block for our domain which we registered earlier
- Create a directory replacing <domain_name> with our domain name (like ‘abc.com’)
sudo mkdir -p /var/www/<domain_name>/html- Assign ownership
sudo chown -R $USER:$USER /var/www/<domain_name>/html- Create a sample page with your favourite editor (Like nano
nano /var/www/<domain_name>/html/index.html) and Paste the sample markup
<html> <head> <title><domain_name></title> </head> <body> <h1>Welcome to <domain_name> !! </h1> </body></html>- Create a server block with the correct directives
sudo nano /etc/nginx/sites-available/<domain_name>and register the configurations
server {        listen 80;        listen [::]:80;
        root /var/www/<domain_name>/html;        index index.html index.htm index.nginx-debian.html;
        server_name <domain_name> www.<domain_name>;
location / { try_files $uri $uri/ =404; }}- Create a link from it to the
sites-enableddirectory
sudo ln -s /etc/nginx/sites-available/<domain_name> /etc/nginx/sites-enabled/<domain_name> will now respond to <domain_name> and www.<domain_name>
- Eliminate the hash bucket memory problem
sudo nano /etc/nginx/nginx.confFind the server_names_hash_bucket_size 64 directive and uncomment it by removing the preceding #
- Check the config
sudo nginx -t- Restart nginx
sudo systemctl restart nginxWe need to point our domain to this instance as well
In order to point the Route53 domain to this web server we need to create the records ()
- Open EC2 console and In the navigation pane, choose Instances and choose our current instance.
- Copy the value of IPv4 Public IP (or Elastic IP if you assigned one).
- Open Route53 console and In the navigation pane, choose Hosted zones.
- Choose the name of the hosted zone that matches the name of the domain that you want to route traffic for.
- Choose Create record.
- Leave the _Record name _field bank, select A-Routes traffic to an IPv4… as Record type, Put the previously copied EC2 public IP in the Value box, leave the other fields default and click on Create Records.
- For www prefix (subdomain) we need to create a CNAME record. Create another record as mentioned in the previous steps with the following field values; Record name=www, Record type=CNAME-Routes traffic… , Value=<domain_name>(like abc.com).
- We can now test out site with any browser, it should display _Welcome to <domain_name> !!. _But at this moment the site is tagged as not secure as SSL certificate is not installed on the server.
- We can refer to AWS official guide for more details.
Securing the site with SSL certificate
- Run certbot for your domains
sudo certbot --nginx -d <domain_name> -d www.<domain_name>We need to provide the information and choose other options asked as per our requirements and complete the process. It should display something like this on completion
IMPORTANT NOTES:- Congratulations! Your certificate and chain have been saved at:/etc/letsencrypt/live/<domain_name>/fullchain.pemYour key file has been saved at:/etc/letsencrypt/live/<domain_name>/privkey.pemYour cert will expire on 2021-10-18. To obtain a new or tweakedversion of this certificate in the future, simply run certbot againwith the "certonly" option. To non-interactively renew *all* ofyour certificates, run "certbot renew"- Your account credentials have been saved in your Certbotconfiguration directory at /etc/letsencrypt. You should make asecure backup of this folder now. This configuration directory willalso contain certificates and private keys obtained by Certbot somaking regular backups of this folder is ideal.- If you like Certbot, please consider supporting our work by:Donating to ISRG / Let's Encrypt: https://letsencrypt.org/donateDonating to EFF: https://eff.org/donate-leIf we refresh the site now, the browsers shouldn’t complain about the security of the site any more.
- As Let’s Encrypt’s certificates are only valid for ninety days, it requires to be renewed, certbot takes care of this. To check the schedule
sudo systemctl status certbot.timerThe output should confirm it
certbot.timer - Run certbot twice dailyLoaded: loaded (/lib/systemd/system/certbot.timer; enabled; vendor preset: enabled)Active: active (waiting) since Tue 2021-07-20 07:31:36 UTC; 18min agoTrigger: Tue 2021-07-20 15:55:04 UTC; 8h leftTriggers: ● certbot.service- To test, we can do a dry run
sudo certbot renew --dry-runA response without error confirms a successful run.
Setup FileZilla for easy file transfer
We need to transfer the web files that we are going to create next with react, from our local machine to the EC2 instance. Though SCP is pretty good for the job but we will use FileZilla for an even easier GUI experience.
- Install proper version of FileZilla depending upon local OS (Download link).
- Edit (Preferences) > Settings > Connection > SFTP, Click “Add key file”.
- Browse to the location of our .pem file and select it.
- It may ask to convert to ppk format, proceed with that and save it.
- File > Site Manager, Add a new site with the following parameters:
Host: Your public DNS name of your EC2 instance, or the public IP address of the server. Protocol: SFTP. Logon Type: Normal. User: ubuntu.
FileZilla will automatically figure out which key to use.
- Test the setup with connecting the site and browse through the file system.
Creating a reactjs application and deploy it
Creating a react project
- Assuming Node.js is already installed and configured on our local machine, we will use
create-react-appto create a react project which will be sufficient for this project. We will call our app as my-app
npx create-react-app my-app- Once it is created we can test the project running locally
cd my-appnpm start- A browser should open on
http://localhost:3000or we can open a browser and navigate tohttp://localhost:3000. The browser should display something like this.
Press enter or click to view image in full size
- Stop the project with
CTRL+Cor⌘+Cin the terminal. - In order to create the production build we need to run
npm run buildThe process should complete without errors and our build folder of the project should now contain minified versions of all the files we require to deploy your project
Deploy the application
Now we need to transfer all the files in build folder to the server folder /var/www/<domain_name>/html as that is the folder where Nginx look for the entry point, i.e _index.html. _For that we will use FileZilla that we configured to upload files to EC2 instance.
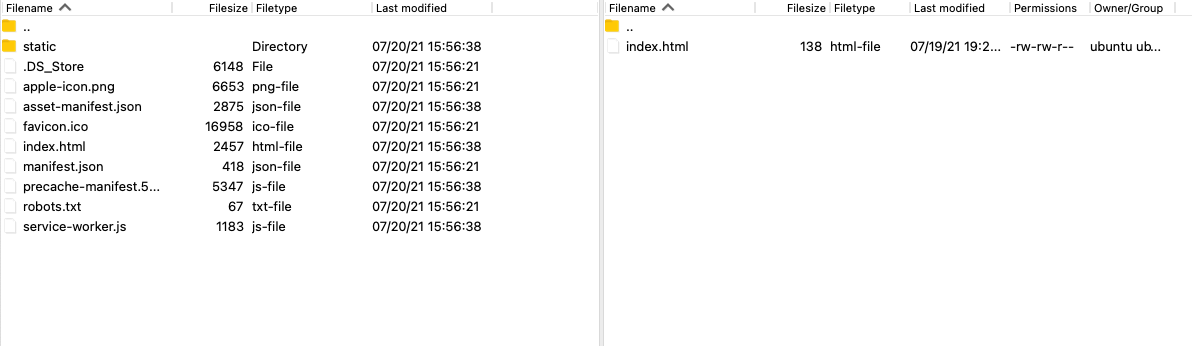
- Connect to the EC2 instance from FileZilla and Navigate to
/var/www/<domain_name>/htmlon the right hand side pane and navigate to build folder of our project on the left hand side. The explorer part should look something like this, files might be different though on the left hand side.
Press enter or click to view image in full size
- Drag and drop all the files from the build folder (left hand side) to
/var/www/<domain_name>/html(right hand side). Let the transfer complete. - Voila! If we navigate to our domain in a browser window, it should show our web site now.
Press enter or click to view image in full size
Browser window pointing to our domain
Thanks for reading! Thoughts are welcome.